Sunday, 25 November 2012

Brussel Sprouts and Bacon: Sprouts for the Haters

I was inspired to actually write a damn blog post today by a Facebook status update I read, posted by someone that I think is hilarious and great. He made a bold statement that is absolutely partly true:  "Food bloggers irritate the piss out of me". When I indicated that his statement made me get my dukes up, because I don't think all food bloggers are irritating, he clarified that he thought our era of every supposed "foodie" in the city running around, eating out, taking photos, posting them on some website and calling themselves an expert was, well, irritating the piss out of him. Sure, I agree. But do you know what's worse? There was a horrendous video someone else posted on Facebook that showed a horde of people literally physically fighting each other to get their hands on cheap smartphones on Black Friday somewhere in Georgia or something and here's what I think:  go ahead, annoying people, post photos of that stupid panna cotta that you probably paid too much for, do your worst, just don't push a fellow human out of the way in the name of a phone. Like I guess on a scale of what's kind of annoying and what's 100% wrong, I'm with the panna cotta photo-posters. The comparison is a bit extreme, I know, and I'm sure the friend I mentioned would absolutely agree - but my point is that the overabundance of food bloggers is pretty damn harmless, in my opinion. Plus, I am one, you know? But just to be clear, I don't take pictures of food in restaurants, or ever review restaurants, because I find the first annoying and intrusive, and I don't purport to know enough to do the latter. So, there. 
 
Let me know if you find this photo irritating.

To the food! A wonderful thing happens to sprouts when you slice them up finely and add bacon and pine nuts. They become the kind of vegetable that people who say that they HATE brussel sprouts actually like. They are honestly DELICIOUS. It's a bit of work to slice these babies up, but it's worth it. And brussel sprouts should not be relegated to holiday dinners - they are a happy side dish with pretty much anything. 

Brussel Sprouts with Bacon and Pine Nuts
Originally a Lucy Waverman joint, slightly adapted

Who could even know these were sprouts?
1 pound of brussel sprouts, finely sliced
4 slices bacon, or a little hunk of pancetta, or even prosciutto
1/4 cup of toasted pine nuts
olive oil for sauteeing the sprouts
salt and pepper to taste

First, fry your bacon or other desired pig product in a big pan that'll hold all your sprouts. Once it's cooked, remove it from the pan and dice it up into little wee pieces of pig product. Drain most of the fat off, keeping a bit of fat for flavour - you'll add a tbsp or two of olive oil to the fat to fry your sprouts, once you've sliced them. I usually cut them in half, down the middle, core and all (who has time to core brussel sprouts?), and then I lay them flat and slice them into ribbons.  

Add a tablespoon more or so of olive oil to the pig fat in your pan, on medium heat. Add the shredded sprouts, and saute, stirring often, for about 10 minutes. You'll see that they'll wilt and begin to lose some of their mass, in the same manner that cabbage or sturdy greens do. Add salt and pepper to taste; but a good hit of both is necessary. After ten minutes, taste some and make sure they've cooked down enough. If they haven't, keep cooking them. Obviously. If they're as soft as you'd like them, stir in your toasted pine nuts and toss them around, and serve the whole enchilada with the bacon sprinkled over top.  

I am an impeccably clean cook.
P.s. I forgot to take a photo of the end result, so you're on your own.
I love these transformative kind of recipes, where something you thought you knew takes on a whole other quality when you do something different with it. To me, it's what makes cooking exciting, you know? You should serve these as a side dish the next time you decide to have people over for dinner, instead of going out and taking poorly lit panna cotta photos. Added bonus? You'll save yourself from irritating the piss out of my friend.     

Sunday, 7 October 2012

A New Family Favourite: Chicken with Soy-Lime Sauce

Long time no see! I really love writing this blog but dayum, it's hard to keep at it in any kind of consistent way. Please forgive me.

This delicious number comes from a favourite cookbook that I refer to constantly, Mark Bittman's How to Cook Everything.

Look there's even a stovetop burn on mine! So authentic.  

It's a great reference book - if you have an ingredient you're not sure what to do with, or if you have something like a chicken breast and are looking for some inspiration. I was actually reading another food blog, www.dinneralovestory.com, and she referred to this recipe, which I then looked up in the book. Dinner:  A Love Story is a great blog. God I spend an inordinate time on food blogs. I remember once being on a train from Ottawa to Toronto, and basically spending the entire four and a half hours consulting all my favourite food blogs. At the end of the trip, the woman sitting beside me said "You must be a chef! All you've been doing is looking at recipes and photos of food the whole train ride!" I explained I was actually just obsessed with food. I felt like I had been caught doing something a bit weird. Anyway. As I've said before on here, I'm a big fan of chicken thighs, drumsticks, or cooking up a whole chicken. And though I certainly went through a loooong phase where the only cut of chicken I ate was breast (I used to buy the big boxes of frozen ones from M & M, you know those - it was a staple during university), I'm certainly not in that phase no more. Chicken breasts can be boring, and dry, and even tasteless. But, they're healthy and easy and usually not offensive to anyone, so I pick them up from time to time.

Here are the limes I sliced thinly to put on top of the chicken. So it turns out,
limes are actually pretty gross to eat as a garnish. Pretty, yes, but inedible
and therefore not recommended.

This recipe involves dredging either a flattened chicken breast, or those thin cutlets you sometimes see them selling on their own, in some cornmeal, then a hot visit in a frying pan to brown them, and then a quick sauce made in the saute pan. It's so delicious and easy. Crunchy, super flavourful, and a little bit special, I'm gonna say.

Chicken with Soy-Lime Sauce
recipe from Mark Bittman's How to Cook Everything


1.5 pounds chicken cutlets             (please excuse me while I get a bit preachy re chicken:  buy good chicken. Avoid factory farmed chicken and aim for antibiotic and hormone-free. Local. Happy chickens taste better, for reals. If you use breasts, pound them until they're nice and thin. Cutlets are thin enough on their own.)
Oil, vegetable or olive is fine
1 cup cornmeal
1 minced garlic clove
4 scallions, chopped finely
1/2 cup of chicken stock
2 tbsp soy sauce
juice of 2 limes          (again, ditch the thinly sliced limes on top of the chicken due to their not actually tasting good)
a handful of chopped cilantro


Salt and pepper your chicken, and then dredge the pieces of chicken in the cornmeal. Saute over medium-high heat, making sure not to cook too many at once and crowd the pan. If you have to do more than one batch remove the first batch and keep warm on a plate in a 200 degree oven, or just tent it with tinfoil. Add more oil if you need to for the second batch. The chicken should take about 8 minutes total to cook, about equal time on both sides. The cornmeal will create a crispy crust, and get nice and browned. Once you remove the chicken, turn the heat down to medium, add a bit of oil, and saute the garlic and scallions for a minute or two. Then add the stock, soy sauce, and lime juice. Scrape up any browned bits and turn up the heat to high, letting the sauce simmer for about a minute. Serve the sauce overtop of the chicken, and sprinkle with the cilantro.  

Sunday, 12 August 2012

Summahtime: Corn Salad with Bacon and Green Onions

This was a dynamo of a side dish that I'll most certainly be making many times throughout the month of August. It's corn season in these parts, and I find it hard to walk past hefty, luscious looking corn on the cob without buying some. And it's always priced for five cobs or whatever, and of course that means that I MUST buy five instead of buying, say, two cobs, which would be a much more reasonable number based on the number of people in my household. But no matter, one can never have too much corn when one lives in Ontario and one likes to enjoy the summer's bounty.

Summer in a saute pan.
So, say you gots lots of corn and you want to do something different. Not because you need to, but because you want to. You could do the whole mayonnaise and parmesan treatment, as I've written about before. It's ridiculously good. We've busted that one out already this summer. Or you could incorporate bacon, which is very rarely a bad thing, and go this route. It's a little ditty that will not disappoint.


Corn Salad with Bacon and Green Onions

2 big fat cobs of corn
2 slices of bacon, cut into a small dice
2 green onions, sliced thinly
Butter, just a wee pat
A handful of halved cherry tomatoes
A small handful of chopped cilantro
Salt and pepper to taste

Saute the bacon in a large frying pan on medium to medium-high heat - you want the pan hot enough to really crisp up the bacon. During the time that the bacon is coming to its crucial crispy point, slice the corn off two cobs. The easiest way to do this is to stand your ear of corn up on a cutting board or similar and slice down on each side of the cob. I usually do the bottom half first, then flip the ear and repeat.  It seems to minimize the amount of corn clean up. I've recently seen a plethora of tips and tricks on various food websites about how to cut corn off a cob without making a mess. I guess if the way you cut corn off a cob results in corn everywhere, you should check those out. I, for one, am probably not going to change my method to save seven kernels. But you should do what you want. Anyway, put your corn into the pan with the bacon, and then add your sliced green onions. Stir everything around and add salt and pepper to taste. Saute for about five minutes, and then add the halved cherry tomatoes and the cilantro, and stir those in well. Let it go for a few more minutes, and you're done! Oh wait, not quite! At the very end you should add that little pat of butter. It will make you and everyone who eats it happy, trust.

Corn, plated.
Also, people should eat more drumsticks. 

Serves two as a side dish. Or, you could put it all in a big ol' bowl and sit on your porch and eat it and not share a single kernel. 


Monday, 2 July 2012

Salmon and Potatoes in Jars

I've been meaning to post this recipe for, I believe, about four weeks now. I made this as a first course for a Saturday night dinner when my folks were visiting from Ottawa. It was dynamite. Easy and elegant - definitely a dish for a special night. The thing with this recipe is that salmon, the good stuff I mean, is pretty pricey. The good stuff that I bought was wild-caught Pacific coho. Buying fish has become a bit of a minefield lately - it's hard to keep straight what's being sustainably fished, what kinds of farmed fish are okay, etc., etc. Suffice it to say that when it comes to salmon, stick with the Pacific coast and stay away from farmed. For a much less simplistic and much more cohesive take on sustainable seafood, check out Monterey Bay Aquarium's Seafood Watch site.  


And yes, I do recognize that there was a similar "rustic cutting
board ingredient layout" shot in the last blog post. 
Okay, enough sustainability talk. So this dish is from the mega-awesome Dorie Greenspan (she's come up a few times before on this l'il site). It's perfect for a summer dinner party because there is no cooking involved, only a kind of brining/curing/letting the salmon soak in olive oil with some delicious friends like thyme, bay leaf, and coriander seeds. You need to plan ahead, but seriously, that's what you want to do if you're having people over, right? Get it done and then relax. You also need a couple of big canning jars for this recipe. I used mason jars and they worked like a charm.


The coolest thing about this recipe is that you serve the salmon and potatoes right out of their jars. Put out a platter of sliced rye bread, lemon wedges, and have people help themselves to jars of goodness. It felt cute and quaint and homey when we did it. I seriously can't wait to find an excuse to make it again.

Salmon and Potatoes in a Jar
from Dorie Greenspan's killer cookbook, Around My French Table. Every single thing I've made from it has been awesome.


1 pound salmon fillet, skin removed        (get the folks at your fish store to take off the skin for you - I had to do it myself and it was not pretty - mangling would be a good word to describe how that went down)
2 tablespoons coarse salt
Happy brining salmon.  
1 tablespoon sugar
1 pound baby potatoes, either red or white, new or old
20 coriander seeds      (obviously this seems ridiculously specific but stay with me)
20 black peppercorn seeds      (see the line above)
4 bay leaves, halved
8 thyme sprigs
2 large carrots, peeled and thinly sliced       (it looks pretty if you do a bit of diagonal slicing action)
2 small onions, red or yellow, thinly sliced
4 cups or so of olive oil        (I know, you're like wtf - but you don't eat all the oil, and you don't have to break the bank - just use your basic - i.e. cheap - olive oil)
3 tablespoons white vinegar or white wine vinegar
lemon wedges for serving
rye bread for serving

Mix together the salt and sugar in a bowl or other glass container. Slice your salmon into fairly thin pieces. See the photo above for an idea of size and shape - you want pieces that are easy to lift out of the jar and place on a piece of rye bread. Make sure that you remove all the little pin bones that can sometimes hang out in your salmon. I do this with a pair of tongs, and I basically just run my fingertips all over the surface of the salmon feeling for the pins. It's actually quite a satisfying task. Place your sliced salmon into the bowl or whatever you're using with the salt and sugar, and gently toss to ensure it's evenly coated. Cover with plastic wrap, and refrigerate for at least 12 hours, and no more than 18 hours.

So, the next day, get out your jars. And Dorie says you can also use a terrine, or a bowl. So don't let not having jars stop you. Bring a large pot of salted water to a boil, and drop your potatoes in. Cook them until they're tender, but not mushy. Drain the potatoes and let them cool. Take out your salmon from the fridge and rinse off the salt/sugar. The salmon will have released a fair bit of liquid, so don't be alarmed by that. So yeah, rinse it off, and pat it dry. Divide up all of your coriander, peppercorns, bay leaves, thyme, and sliced carrots and onions. Half will be for the jar of salmon, half will be for the jar of potatoes.

Wide mouth masons.

Basically you're first going to layer the salmon in the jar with its half of the aromatics - a little bit of salmon, a little bit of peppercorns, coriander seeds, bay leaves, thyme, carrots, and onions, and repeat until you're out of salmon. Top the jar with olive oil, covering all of the ingredients. Seal the jar. Do the same layering number with the potatoes in the second jar, but with the potatoes add a pinch of salt with each layer of them as well. Top with the olive oil to cover, and also add the vinegar to the tater jar. Shake that jar a bit to mix up the oil and vinegar. Put the jars in the fridge for at least 6 hours and up to three days.

More food should be served directly out of jars, no?

Serve right out of the jars with lemon wedges and rye bread. This seriously ruled. It was kind of heavenly, really. And cute because it was in jars and stuff. Serves about 6 as a first course or 4 as a main.  

Monday, 30 April 2012

Chicken Albondigas Soup: Or, Soup With Yummy Meatballs In It

Hi!  So this soup was tasty - light and flavourful. The prep was a little multi-pronged without being hella overwhelming. Good soup to have in the repertoire, and nice at this transitional time of year, otherwise known as Sprinter.

Note the knife scrape-marks I implemented on the chipotles
(2nd from top left) to make this photo more pretty.
I am SUCH a perfectionist.

Also, this soup felt (and was) healthy. I spent the weekend at a bachelorette party, and let me tell you, "healthfulness" was not part of the festivities. We mainly consumed nacho chips, regular chips, about 11 different kinds of dips, and probably 8 pounds of cheese. Whatevs, we had a salad at one point. Don't judge.

If you had time, you could do up the meatballs beforehand (even the day before), and then putting the soup together would be a total breeze. As it stood I kinda puttered around doing different parts throughout the day. Because I obviously have nothing but time.

Chicken Albondigas Soup
This recipe is from an ahmaaazing cookbook that I routinely leave open on my counter for browsing purposes. And see, I stumbled upon this and happened to have ground chicken! Fate. It's the Food and Wine Magazine's 2001 Cookbook.


Foreground:  meatballs.
Background:  Inspirational material.
1 tbsp of olive oil
5 green onions, sliced finely
3 cloves of garlic, minced
about half a red pepper, diced        (you could use yellow or red pepper, but can I say don't use green? Green peppers are gross.)
Half a jalapeno pepper, diced         (leave in the seeds and ribs if you like heat)
1/2 teaspoon ground cumin
1/2 teaspoon ground coriander
1 pound of ground chicken, or turkey     (just your average package of ground meat is the size I used - I can't be bothered to go back to the package to check exactly how much meat it was, but let's say a pound? yeah?)
1 cup of cooked rice       (if you didn't have cooked rice, I say go ahead and use bread crumbs as you would in a normal, non-Albondigas style meatball. I cooked rice special for this - see above re 'nothing but time' - but I get that that might not be doable)
1 egg white
A good handful of chopped cilantro
2 canned chipotle chilis in adobo sauce, minced        (get a can of these puppies, you won't regret it - also, they keep for a long time in a good tupperware in the fridge once you've opened them)
Salt and pepper
1 can of corn        (the recipe called for 1/2 a cup, but I wish I had put more corn in, so use the whole can - and don't be like me - I have some weird love for eating corn right out of the can and ate too much of it)
A handful of chopped tomatoes
4 cups of chicken stock
Lime wedges, for serving

I know this is a bowl of raw ground
chicken but I was kind of into this photo.
To make the meatballs, which you'll then simmer in the stock to cook, saute the green onions, garlic, red pepper, and jalapeno pepper over medium heat in the oil until they soften. About 5 minutes. Then add the ground cumin and coriander, and saute that in good, until you can really smell the spices, another minute or two. Let the mixture cool, then add it to a bowl with your ground chicken in it. Add in the cooked rice (or bread crumbs), the egg white, the cilantro, chipotles, and a good dose of salt and pepper. Mix it up well, and then form into small meatballs. Mine were mega-wet seeming, and I thought the whole thing was going to be a wash at one point. But I popped them in the fridge to firm 'em up, and that worked like a charm.  They stayed together brilliantly in the soup.

Once your m-balls are ready, bring your chicken stock to boil in a big soup pot. Add in the corn kernels and chopped tomato, simmer those for a few minutes, and then plop in the meatballs. Keep the heat at medium, and let it go for about ten minutes or so. Check a meatball if you're unsure of doneness, but it really doesn't take long. Serve in big bowls with a squirt of lime juice and some more chopped cilantro.

So on-theme with the limes, eh? You think this stuff just happens?
Also note how "brilliantly" the meatballs stayed together.

Monday, 19 March 2012

Long-Cooked Broccoli: aka Broccoli That Is The Opposite Of Raw

Raw broccoli is not an interest of mine. It tastes too much like what I imagine an actual plant or fern would taste - and yes I know how ridiculous that sounds given that it is of course a plant itself, but it tastes too grassy and woody and just plain raw when it's uncooked for me to ever want to eat it in that state.

This will become "luscious, unctuous"...yeesh.
I love it steamed, though, and especially roasted...and now, now my friends, I have found the best possible broccoli recipe EVER. You will balk at how long you cook the broccoli for - about two hours! - but I swear, it transforms this familiar vegetable into the most luscious, unctuous dish ever. It's not at all reminiscent of the gross, over-boiled vegetable that you may know from childhood. It is AWESOME. You blanch it briefly in boiling water, then you saute it on low, with some garlic, chilies, and anchovy paste...add a heavy hand with the olive oil and you will open the pot after a seemingly stupid long time elapses and you will find heaven. I'm not even exaggerating. I seriously loved this so much. Also, don't be hating on anchovy paste. It doesn't taste fishy, for reals. It just adds depth and a kind of earthiness, or something, to the dish, and it's absolutely crucial. Trust.

Long-Cooked Broccoli
adapted from Food52:  http://food52.com/blog/2860_roy_finamores_broccoli_cooked_forever

1 big head of broccoli, florets cut into fairly large chunks, and stalks cut into 1/2 inch coins  (broccoli stalks always hit the trash too fast, and they're perfectly delicious - I chop off the very end, and then peel the stalks with a vegetable peeler - then slice away)
3 big cloves of garlic, sliced thinly
3 small red or green chilies, halved vertically      (for this recipe, you want the thin, long-ish chilies, often called thai chilies) 
anchovy paste, about half of a 56 gram tube      (I checked the tube, it's actually 56 grams)
olive oil, about a quarter cup
salt and pepper


Broccoli, I never knew what you were capable of.

So, set a bit pot of water to boil. Once it's boiling, (carefully) plop in your stalks and florets, and leave them to boil for 5 minutes. Drain them off. Once the broccoli has gone into the water, heat up the olive oil over medium heat in the biggest frying pan you have (that has a lid - if not just use a plate. Man, I am FULL of good ideas). Add in your sliced garlic. Once the garlic starts to sizzle in the oil, add the chilies and the anchovy paste. Let it all sizzle together for a few minutes, then reduce the heat to low. Once you remove the broccoli from the boiling water, put it into the pan with the garlic, chilies and anchovy paste.  Give it a good stir, and cover the pan. Let it do its thing, on low, for about an hour and half. No joke. Stir it maybe three or four times throughout, and taste for salt and pepper and add if you think it needs it. Anchovy paste is pretty salty, so watch out for that. The dish will come out at the other end as a rich, luscious, unctuous (ah, just kidding, I have other words!) mushy-but-in-the-best-way broccoli.  


It's long-cooked broccoli on pasta, but from a dream!

I served this whole green mess on penne rigate. It's ridged penne, okay? I also grated some parmesan over top at the end, just to gild the lily, as I am wont to do. You will honestly have a deeper respect for what broccoli is capable of after you make this. Not to mention what a low heat bath in garlic, anchovy, and chilies can do for a vegetable you thought you knew.

Tuesday, 28 February 2012

Weekday Fancy Times With Virtually No Work: Baked Sausages With Tomatoes

Before shot.
This meal will mos def become part of your regular meal rotation...and it's so deeply flavourful and delicious that it's an easy winner for a wee dinner party like the one we had last week. Having people over for dinner on weeknights can be, well, a pain in the ass. It ends up feeling too stressful and frantic - cleaning, cooking, setting the table, etc, etc, all when you're running in the door around 6pm and people are coming for 7.

So this is one of those recipes that will alleviate at least the cooking franticness...you basically throw a bunch of cherry tomatoes, garlic, and some herbs in a big pot (one that you can put in the oven), lay some sausages on the top, pour over some olive oil and balsamic vinegar, and pop her in the oven. About 45 minutes later, you get beautiful, moist sausages sitting in this herby, hefty, rich tomato sauce that has just miraculously appeared (well, no, it came from the tomatoes, but it's one of those dishes where it's so different after the oven does its work that it's hard to not be a bit delighted). Serve it over mashed potatoes (or polenta would also be nice - but I have screwed up polenta all three times I've tried to make it and I just eventually said that we were breaking up, because it's not like without polenta in my life, I'm walking around missing it all the time).

This pot is about to become the home of a sausage party.

Baked Sausages and Tomatoes
Adapted (only slightly) from a Jamie Oliver recipe

3 pounds of cherry tomatoes, or roughly chopped regular old tomatoes 
a handful of herb sprigs, including rosemary, thyme, oregano
3 cloves of chopped garlic
8 delicious sausages        (I think it's worth it going to a good butcher for good sausages - they are inexpensive and you can tell when they're made with care - for this I used a mixture of hot italian, sweet italian, and garlic sausages)
Olive oil
Balsamic vinegar
Salt and pepper

Preheat the oven to 350 degrees Farenheit. Get a big oven-proof pot or pan, and toss in your chopped tomatoes, garlic, herbs, and a good dose of salt and pepper. Add a couple of good glugs of olive oil, and mix everything up so well coated. Then, lay your sausage on top of the tomato bed, and pour a bit more olive oil and a good glug or two of balsamic vinegar. Mix everything around together a bit, and make sure that the sausages end up on top. Put the pot into the oven for half an hour. Once that time has elapsed, take it out of the oven, give things a bit of a shake and turn the sausages over. Pop it back in the oven for between 15 and 30 minutes.  

As you'll see, we're still only working with sausages here.
They're never gonna be that "presentation-friendly".

So, after a total of 45 minutes to an hour, the tomatoes will have broken down and become a lovely sauce. If the sauce is too thin for you, you can take out the sausages, and put the pot over a high heat to reduce some of the liquid. I did, and I think it intensified it even more, in a good way. I served it with mashed potatoes (which I gussied up by adding about a quarter cup of sour cream and a big handful of grated parmesan with the milk and butter). It was awesome.

Tuesday, 17 January 2012

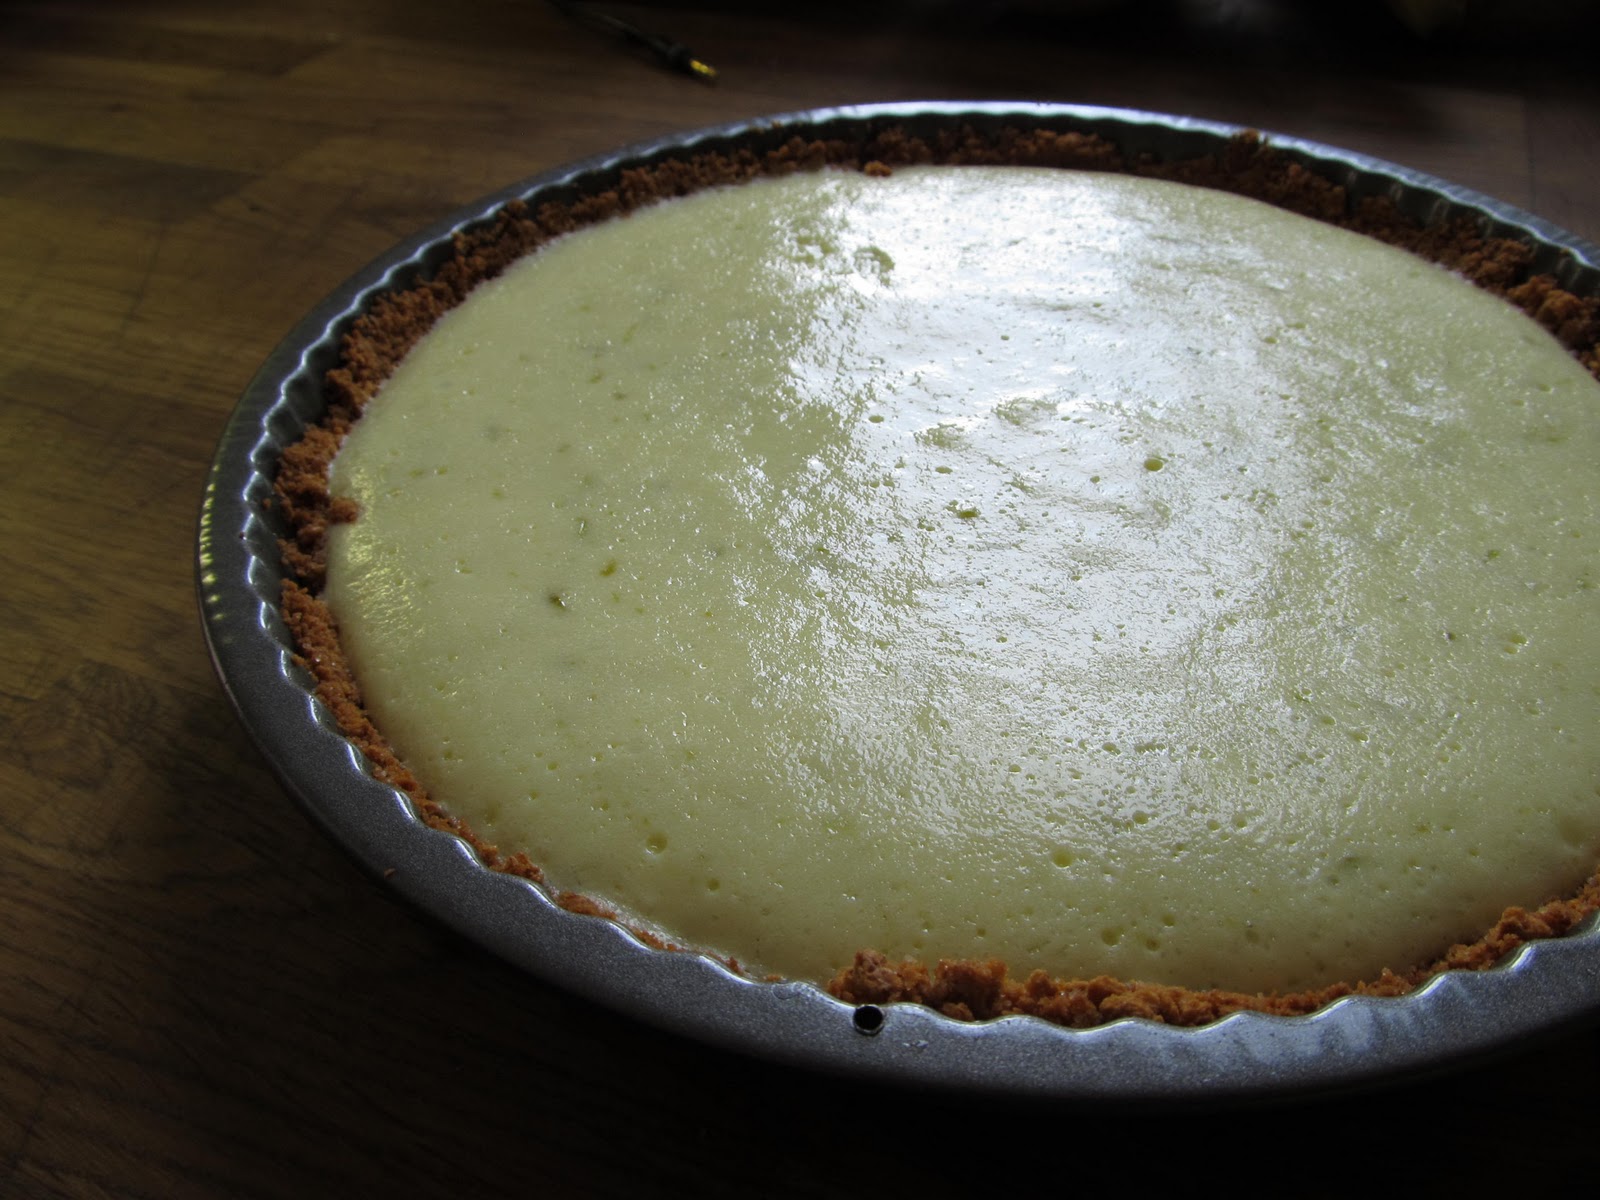
Hark! A Dessert! A Lime Tart, In Fact!

As I've said before, I'm not so into sweets. A pint of ice cream can sit in my freezer for months, and I just won't feel like eating it. A bag of chips on the other hand? I'm a goner. They may last minutes. As a result of this indifference towards the sweeter things, I don't post a whole lot of desserts on here...but this, my friends, was a delicious dessert, worthy of posting. And soooo easy.

Don't worry, the dessert itself isn't lime juice.

I have an aversion to baking - well, it's more than an aversion - I think I don't like baking because I'm not very good at it. The measuring, the levelling, the dry with the dry and the wet with the wet, it's too fussy. I get impatient and quite often I end up with a sub-par product. Like the whoopie pies I tried to make on my birthday, which, by the way, were FROM A MIX. But you were supposed to dollop out these dainty little individual pies onto wax paper and use TWO baking sheets and the first dainty little dollop got mucked up and stuck and the wax paper moved and I swore and then put the whole thing in a loaf pan. Things in loaf pans don't really scream 'dainty'. Then I had the BRILLIANT idea of slicing the loaf in half horizontally and putting the white, weird, mallow-y filling in the middle like a big fat loaf sandwich and I swear to god the whole thing was disgusting and people only ate it at one in the morning when they were too drunk to notice it tasted like chocolate chalk with marshmallow glue in the middle. And that's just one example of a pretty significant baking failure.

But this li'l tart here is delicious and bright-tasting and requires very little effort. All of six ingredients, with a big fat citrus punch (much different than a big fat loaf sandwich). I loooove the citrus. In the hierarchy of sweet things that I like, I think I would put sour keys at the top, citrus-based desserts in the middle, creme brulee somewhere in there, and chocolate at the bottom. Nothing against chocolate, just isn't my fave. And sour cream and onion chips beat all of those things. So it's relative.

Note that you need a tart pan for this recipe. I bought one for a cool five bucks at my local mega-conglomerate grocery store. Bully for me!

Lime Tart
Recipe source:  Everybody Likes Sandwiches, a fantastic Vancouver food blog - www.everybodylikessandwiches.com

This is what baking success looks like.
It's rare for me.
For the tart shell:

1 1/4 cups graham cracker crumbs        (I bought graham crackers and smashed the crap out of them - first I put them in a big ziploc and bashed them with a cast iron pan, but then the bag broke. So I just sort of crushed them in a bowl and then got them quite fine with a pestle - ha I just had to google 'mortar and pestle which is which' to write that instruction)
2 tbsp of white sugar
5 tbsp of butter, melted

For the filling:

3 eggs
1 300 mL can of sweetened condensed milk
1/2 cup of lime juice (about 4 limes)
2 tsp of lime zest (about 2 limes)         (I use a microplane - if you don't have one, you should buy one - it's a good $12 or so investment)


Preheat the oven to 350F. Mix the graham cracker crumbs with the sugar and melted butter until well incorporated. Press the crumb mixture into the tart pan, making sure to press it up along the sides as well as the bottom. Pop it in the preheated oven for 10 to 15 minutes. Let it cool.

Zesty!
While your tart shell is baking, beat the three eggs in a bowl until they're frothy. You could certainly do this with a whisk, but an electric mixer is less laborious. Add in the can of sweetened condensed milk, and beat with the eggs for five minutes. Add in the lime juice and zest, mix it all up, and pour it into the cooled graham cracker crumb tart. Back in the oven for 10 to fifteen, and bob's your uncle, you just baked dessert! And you didn't screw it up! The tart should be set, and not jiggly anymore. Once it's cooled, stick her in the fridge to cool for a while (or overnight).

I served it with unsweetened whipped cream. You could add some sugar to your whipped cream, but I thought the tart was sweet enough without it. So I'm saying I don't think you should.

Saturday, 7 January 2012

A Packet O' Fish! Purity Abounds.

Happy New Year to y'all. So, did you overeat, over-drink, over, you know, everything this holiday season? Because I sure did. As penance, oops, I mean as a delightful cleansing mechanism, I've decided to make January a dry month. Aaaaaaand it's only the 7th. Frig.

Anyway, irrelevant, I'm here to talk about fish in a foil packet. This is mega-easy, and a good technique for most any kind of fish...you can also completely mix up what you put in with the fish in the foil packet, to your heart's content. I used sole here, but you could also use any whitefish (halibut, tilapia, cod, etc.) or salmon. For the toppings (accoutrements is a better word to describe what I mean here, but I wrote it and thought it looked a bit frou frou so I took it out, then added it to the bracket, and replaced it with 'toppings' - genius), I used thinly sliced lemon, cilantro, olive oil, garlic, and salt and pepper. But it would also be super nice with any other fresh herb, or you could do some asian flavours, say soy sauce, ginger, a little orange juice, cilantro and sesame oil.  Or basil and chopped olives and grape tomatoes and a little white wine (I mean, if you drink wine - but like, I don't drink, so I wouldn't know). Point is, this fish packet here is your playground. Doesn't that sound so fun???

Virtue, thy name is fish in a foil packet.
Fish is kind of special in our house - I find it's too pricey to eat that often, at least if you're getting stuff that's decent, and I'm not that into, I don't know, Alaskan pollock or similar, to put that jazz in the rotation with any regularity. So I got pretty excited making last night's dinner. But look how pretty and fresh it looked pre-oven (look to your right)? So nice-looking, right? So healthful! So me in 2012! Ha.

Foil Packet Fish with Lemon and Herbs

1 pound of any fish you like      (I had four very thin fillets, so I actually just layered two fillets for each serving - and slammed in more lemon slices and herbs to really jack up the flavour - but if your fish was thicker, no layering would be necessary.  But really, don't trouble yourself with fish thickness.  Because your fish will be firmly ensconced in a little bath of moisture from the lemon and olive oil and tomatoes, it's pretty damn hard to muck it up.  Also, I use about a half a pound of fish per person, so this served two people)
one small lemon, thinly sliced
a few tablespoons of chopped fresh cilantro
olive oil
a big clove of garlic, thinly sliced
a big handful of grape tomatoes, halved
salt and pepper

Packet of soul.
Preheat the oven to 425 degrees F.  Lay down two big sheets of foil (about the length of a baking sheet). Place the fish in the middle of the foil, and then layer/sprinkle all the ingredients over top. C'est tout. Fold up the foil packet on all sides - I usually pull the top and bottom in, and roll them together, and then pull in the sides, rolling and scrunching them tightly as well. It should look like the foil packet you see on your right. I made two of these, one for each person.

Pop those puppies in the oven, and leave them in there for about 12 to 15 minutes. Let it rest for a few minutes before serving. I served the packets directly on the plate, with quinoa and asparagus. Because my body is a friggin' temple.

This would have tasted really good
with a glass of white wine.

Thursday, 22 December 2011

Sweet Potato and Swiss Chard Gratin: Hearty and Heartwarming, and Mildly Healthy

Made this little number the other night to serve with pork tenderloin. It was a really good, cozy dish...but I gotta say off the top that it was a bit of a multi-pronged, significant-pot-dirtying kind of dish. But it was so bubbly and cheesy and a little bit crispy that I had to share (also, it's oddly delicious cold, right out of the casserole dish, say, this morning or something). Just block off a bit of time and the inclination and a layered dish of healthful ingredients with lots of cheese will be your reward. Serve it with something that's easy and no-fuss.

Chard, de-stemmed.
It's so pretty, the red, no?
I'm totally avoiding apologizing for not posting more in the last month, because I fear that my apologies for not posting will become less and less meaningful the more often I write them. So, I'll spare you. I think about posting in the blog a lot. Like, daily. But what good does that do for anyone. Diddly squat. But I digress.

Chard is nice in this dish, but it would also work with spinach, or kale. As for the sweet potato element, one could easily replace that with regular potatoes, if one wished. One can do many things of one's own choosing, really.

Without further ado...(remember, I said it was a bit of a pot-dirtying recipe)...

Swiss Chard and Sweet Potato Gratin
Adapted from Smitten Kitchen, www.smittenkitchen.com

1 bunch of chard, de-stemmed, with stalks       (chard is a beautiful thing - and the stalks are just as good as the leaves - so slice them right out of the leaf, and then dice them.  Then I just pulled apart the leaves into big chunks.)
1 small onion, diced
2 cloves of garlic, minced
1 cup of milk
1 tbsp butter
1 tbsp flour
1 cup of grated cheese      (the original recipe called for Gruyere, and though at one point I hope to be the kind of woman who just has Gruyere in her fridge, I'm not there yet. I used a combo of old cheddar and parmesan.)
1 pound or so of sweet potatoes, peeled and sliced into 1/4 inch slices
a big sprig of thyme, or rosemary       (feel free to use dried, but don't skip it, it's a good addition)
salt, pepper
butter or oil for frying chard

First, deal with the chard. Saute the onion in a some butter or oil, until it's softened - about 5 minutes or so. Then throw in the diced chard stalks, and saute those for a few minutes to soften. Then in go the leaves, until they are thoroughly wilted and cooked down. Now this is an important step - you need to squeeze this chard action as dry as you possible can. Just use your hands. And do it longer than you think you need to - the gratin will be too wet if you don't. Having said that, it will be wet because of delicious things like melting cheese and butter, so, you know.

Without natural light, I have no game when it comes
to taking pictures.  
Heat the 1 cup of milk in a small pot with the big sprig of thyme or rosemary in it, and the minced garlic. Don't let it boil, just heat it up nice.  In a medium-sized pan, melt your tablespoon of butter over medium heat. Once it's melted, add in your tablespoon of flour, and whisking the shit out of it to avoid lumpiness. You just made a roux! Congratulate yourself. Then slowly pour the heated milk (remove the sprig if you used one) into the butter and flour (I mean the roux!) and continue whisking over low heat, and remove once you've got a mildly runny pasty kind of texture. Okay, that's done.

Now get a deep baking dish. The recipe asks for a 9 X 13 baking dish but I'll be honest with you, I have no conceptual idea what size that actually is. I just used a big-ish, round, deep pyrex dish. Preheat your over to 400 degrees F. Layer half the sweet potatoes on the bottom, then 1/3 of the cheese, and then half the greens. Salt and pepper it up, then pour half your milky roux over all that. Repeat the process, and finish with the last third of the cheese.

Soooo good. Seriously, so good. It's an ultimate winter dish.


Pop her in the oven for about an hour, covering with foil if you're getting concerned about advanced browning of the top of the gratin. Let it sit for ten minutes before dishing it up. It's really fantastic, and worth the effort. A very special side dish.  

Sunday, 20 November 2011

Pulled Pork: I Know, I Know, Another Pulled Pork Recipe...

I feel like everyone is a little pulled porked out, and it seems there's a recipe for it around every corner of the internet, but I swear, this one is totally worth it. It is the recipe of a genius woman who writes a genius blog called Homesick Texan (www.homesicktexan.blogspot.com), who posts recipes for all kinds of fantastic dishes like this one, or Dr. Pepper Peanut Brittle, or Spicy Buttermilk Onion Rings. All amazing. Check her shit out, for reals.

So, anyway, this pulled pork. The photos are pretty crappy, I'll admit. But it was so so so good that I'm not going to wait to make it again to post the recipe. But oh, I'll make it again. You just watch me.

But listen. This pork recipe requires a bit of forethought, and a bit of effort. Like, you make your own dry rub, and then you make your own barbecue sauce. I know, right?  It's kind of some work. I give you my full permission (because you of course need my permission to do things) to use a store-bought rub (but try and find one that's not chock-a-block with MSG and sodium - although, I kind of love MSG and sodium, so even then do your worst) and a store-bought sauce. The real breakthrough in this dish isn't really, to me, about the rub and the sauce - though goddamn they are good. It's the fact that you buy a honking piece of bone-in pork shoulder, which is the cheapest thing ever, and you rub it with the dry rub, and you stick it in the oven for eight hours, or so, maybe seven and a half, maybe eight and a half, whatever works, because YOU CAN'T MESS IT UP. I promise, it will always be good.


Frankly, I don't think this needs a caption.


Pulled Pork with Coffee Chipotle Rub and Chipotle Barbecue Sauce
From Homesick Texan (www.homesicktexan.blogspot.com)


Pulled Pork


4 - 6 pound pork shoulder, bone-in
dry rub (recipe follows)
barbecue sauce (recipe follows)


Rub the pork shoulder all over with the dry rub. Make sure you get into every nook and cranny. Ideally, you do this step the day/night before you are going to be cooking the pork, which gives the rub a chance to really dig in. But, do what you can with the time that you have. Wrap it in plastic and refrigerate once you've completed the rubbing process.  


Take the pork out of the fridge, remove the plastic wrap and let it come to room temperature. Preheat the oven to 250 degrees celsius. Put your pork in a deep roasting pan, and pop her in the oven for a max of about 2 hours a pound. Your pork is going to be in there for a while, so this is perfect for a lazy Sunday or one of those days when you're "working from home". Don't be concerned by how dark the pork looks - it's just the super dark rub intensifying and taking on an even deeper colour as it roasts. 


When you think you've left the pork in for long enough, take it out of the oven and poke around a tiny bit- if the meat is shredding and basically falling apart before your eyes when prodded, it's done. Don't pull it apart anymore at this point, though - let it rest, very loosely covered in foil, for about an hour. At this point, hopefully your sauce of choice (but seriously, it's nice to make your own sauce if you can swing it) is heating on the stove. After the pork is rested, pull it apart (it is an EXTREMELY satisfying task). Then toss with as much warmed barbecue sauce as your heart desires. Some people like their pork super saucy, some like it on the drier side. It's nice to toss with some sauce, and then serve some on the side for those that like more. I didn't do that last time though - I just dropped the whole pot of sauce into the pork and I don't think anyone was disappointed.         


Dry Rub


Pork and biscuits!
Ugh, this photo is a bit painfully lit. Apologies.
1/2 cup brown sugar
1/4 cup black pepper
1/4 cup of finely ground dark coffee      (I used instant coffee - don't judge me)
1/4 cup smoked paprika
2 tablespoons salt
1 tablespoon chipotle powder
2 teaspoons granulated garlic
2 teaspoons of cinnamon
2 teaspoons cumin
2 teaspoons allspice         (I didn't have allspice, didn't use it, and didn't miss it)


Mix all the dry rub ingredients together in a bowl. This made enough for waaaay more than one pork shoulder, in fact, I've used it for two and I still have some leftover. I bet it would taste hella good on chicken, or maybe even lamb? Go crazy.


Barbecue Sauce


1 teaspoon canola oil
1/2 half a medium onion, chopped
4 cloves of garlic, minced
2 cups ketchup
1/4 cup yellow, ball-park style mustard
1/4 cup molasses
1/2 cup cilantro, chopped
1/4 cup brewed coffee           (I added a mug of instant coffee - see above re judging)
2 chipotles peppers in adobo sauce, chopped          (just use the two peppers - those babies are h-o-t - and the rest of the can will keep in the fridge for a while)
2 teaspoons Worcestershire sauce
1/4 cup lime juice
Salt and black pepper to taste


Heat the oil over medium heat in a medium-sized saucepan. Add in the onion, and cook until it becomes translucent, about five minutes or so. Add the garlic and let it mingle with the onion. Add the rest of the ingredients, and turn the heat down to low. Let it simmer for about a half an hour, and then either transfer to a blender and blend, obviously, or use a hand blender. It will keep for about a week in your fridge, but I found that I used the whole kit and caboodle in order to properly smother the pulled pork once it was done.


So there you have it, a three-pronged recipe for your reading and eating pleasure. Have I mentioned yet how ridiculously cheap pork shoulder is? Well, let me tell you:  it's ridiculously cheap. So it's perfect for feeding a crowd. I like to serve it with biscuits, some kind of cold salad (potato salad, coleslaw, etc.), and collard greens (and there's a li'l recipe for those on this here blog!). To minimize the amount of work in the recipe, you could totally break it down in parts...make the rub one day, make the sauce another, and then cook the pork on the day you want to serve. You won't regret the time you spend on it. Promise.  

Wednesday, 9 November 2011

Sweet and Spicy Cocktail Nuts: Perfect Little Bites of Nutty Goodness

Should I bother apologizing for the delay in posts, or does it just seem insincere now? I promise, I's been busy. But I think about posting all the time. Pinkie swear.

These were really delicious, and massively easy. The recipe is from a gorgeous cookbook called Around My French Table by Dorie Greenspan. I was going to title this post 'Dorie Greenspan's Nuts' but it felt disrespectful. I have a feeling from her cookbook that she's a really nice person and I didn't want her to think I was making fun of her.

Hot nuts.
Basically you beat an egg white lightly, toss in a couple of cups of nuts until they're coated with the egg white, and then add a few teaspoons of spices and a significant amount of sugar. I think it's an excellent nibble to serve before dinner, and it would also make a nice little gift, given that the holiday season is fast approaching.

The nice thing is you can switch up the spices however you please - you could make these with curry powder, smoked paprika, or ground chipotle and cumin and cinnamon, which is what I did. The original recipe asked for predominantly chili powder, but I wasn't feeling that. Point is you can put any kind of combo in there, as long as you stay with things that work well together and try and stay with the amounts called for. You want them sweet, and spicy, but not in a punch-you-in-the-face kinda way.

Nuts that have pretty much cooled down.


Sweet and Spicy Cocktail Nuts
Pretty much lifted entirely from Around My French Table by Dorie Greenspan (who seems like a really nice person)

1/2 cup sugar      
1 1/2 tsp salt
1 1/2 tsp chipotle powder
1/2 tsp ground cinnamon
1 egg white, beaten
2 cups of whole or halved nuts         (I used cashews, almonds, peanuts, and walnuts - killer combo - but  seriously use whatever you happen to have)

Preheat the over to 300 degrees Farenheit. Measure and mix together the sugar and spices in a small bowl. I know it's a bit fussy with the teaspoons and the half teaspoons and whatnot, but there are times when measuring with those wee spoons makes me feel quite dainty - which I can get into. Again, feel free to mix and match your spices based on your tastes. In the original recipe, Greenspan uses chili powder but it's too evocative of actual chili for me so I veered into chipotle territory. I did not regret it.

If I could live in a permanent state of dinner party
attendance I think I'd be really happy.
In a larger bowl (that will fit all your nuts - God there are just so many jokes here), beat the egg white lightly, so it gets a bit separated and loosey-goosey. Toss the nuts into the egg and stir to coat. Then add the sugar and spices, and make sure everybody's evenly covered. Place the nuts on a single layer on a cookie sheet with a little lip. The nuts will mos def stick to the pan, so put down a layer of parchment paper or spray with non-stick cooking spray before you lay them down. Really make sure they're in a single layer, as you want them to cook evenly.

Bake them for 30 to 35 minutes, until they're browned and the coating looks to be completely dried. Transfer the nuts to a cutting board, breaking them up as necessary. Let them cool completely, then serve as a little snack or a nibble before dinner. I'm really into these little nibbles before dinner.


Saturday, 8 October 2011

Bacon, Olive, and Sharp Cheddar Bread: Don't Freak Out! No Kneading, No Yeast!

Okay, so before you tune out this entire post due to the fact that it's a bread recipe, let me assure you that it's more like the savoury equivalent of banana bread in terms of difficulty level. Laura Calder, whose recipe this is, calls it an 'aperitif cake', which she can do because she lived in Paris for a while and she's quite stylish and all that. I feel a bit ridiculous calling it an 'aperitif cake', so we move forward identifying it as bread. Fine with you?

Resting bread.  Can you guess which loaf has bacon in it?
I'll just tell you.  The one on the right.  The better-looking one.
Obviously.

This loaf ruled. Calder suggests you serve it before a dinner party, something to tide people over before the meal. I love this idea. It's very sophisticated. Very French. But you can serve this any old time - I think it would be a nice snack, and would also be a punchy little breakfast bread. Or be all Paris (pronounced Par-eeh) and serve it as an aperitif (pronounced a-pear-a-teef - just kidding, I know y'all know how to pronounce that).

And again, the best thing about this is how hella easy it is to make. No intimidating bread-like elements like kneading or yeast, or special paddle attachments for your special stand-mixer. Just a couple of bowls and a loaf pan (or two loaf pans, if you're me - I did one with bacon and one without - guess which one was better).

Bacon, Olive, and Sharp Cheddar Bread
This is a recipe of the aforementioned Laura Calder, whose website is at www.lauracalder.ca

I brought these to a meeting.
Yes, I had a meeting where I was required to bring snacks.  
1 and a half cups flour
1 and a half teaspoons baking powder
1/2 teaspoon ground black pepper
3 eggs, lightly beaten
1/2 cup, plus another tablespoon butter, melted
a big handful of chopped green olives         (you could use black olives, but I think the green lends the whole loaf more of a consistent earth-tone kinda thing)
6 slices of bacon, chopped into 1/2 inch squares and fried/broiled         (Calder's recipe called for four slices, but that's such a joke - use 6)
1 cup of grated sharp cheddar cheese         (you could also use Gruyere, parm, asiago - anything that is grate-able and has a nice strong, sharp taste)
a pinch of salt         (but seriously, go easy - you've got bacon, cheese, and olives in there - a lot of salt action already)
2 tbsp of chopped fresh rosemary         (this was a nice addition, but totally not necessary)

So here's the drill:  preheat your oven to 350 degrees F. Butter a loaf pan, and then throw a tablespoon of flour in there and shake the pan around, so the flour covers the butter. Your pan has now been buttered and floured.  

Mix the flour, baking powder, and ground pepper together in a mixing bowl. Beat the eggs lightly, then add them into the flour, mixing all with a wooden spoon. Then stir in the melted butter. Don't over-mix, just stir until everything is incorporated. Now add the cooked and chopped bacon, chopped olives, and grated cheese. Again, just try to evenly distribute, not more than that. Overworked batter is no good.

Spoon the batter into the loaf pan, and stick her in the oven for about 45 minutes. You'll know it's ready when it's slightly browned on the top and a toothpick inserted in the middle comes out clean.  

Let me tell you, making this bread kind of made me feel like some kind of pioneer.

Let it cool slightly, and then remove it from the pan. Slice it up. And then definitely follow Calder's instructions, which are to 'serve with drinks'. I mean, unless it's breakfast.

Monday, 26 September 2011

Tomatillo Salsa

So, seasoned food bloggers tell me that busting out of the gates with a pretty consistent posting schedule and then all of a sudden barely ever posting is the easiest way to have a food blog that nobody reads. I am batting a thousand on this front, and for this, dear reader(s), I apologize.

I've been cooking a fair bit, it's not that (though that also happens sometimes)...I just can't seem to find the chunk of time in conjunction with the chunk of energy and the chunk of forethought (i.e. remembering to photograph the freakin' dish before it's eaten) that must come together to write a post. I also have always had a sneaking suspicion that I am actually a very lazy person who has spent my whole life willing myself to be un-lazy but really is the ultimate laziest, and therefore chunk of time + chunk of energy + chunk of forethought is much harder to come by for people like me. But these deep, internal insecurities have nothing to do with tomatillo salsa, do they? Let's move on to that then, shall we?

Look!  A different cutting board!
Lovely tomatillos, which it turns out, come in many colours.
This is a pretty delicious little number. Tomatillos are a fairly new thing for me, in that I didn't even really know what they were until about a year ago. But boy, am I glad that I've made their acquaintance.  They resemble small, unripened tomatoes (though again, this time they were all multi-coloured, so, not always green), but for the fact that they come ensconced in a papery husk. Once you rub off the husk, they have a sticky, kinda sappy thing going on that you have to wash off. They're hardy little guys, these tomatillos, and full of tang and pep. Perfect for salsa.  And salsa?  Salsa is perfect with so many things:  nacho chips, scrambled eggs, enchiladas, tacos, etc., etc.

Tomatillos, post-husking, post-washing weird sticky sap off.
Tomatillo Salsa


Tomatillos, 2 pounds or so, halved or quartered        (this recipe is definitely a set of loose guidelines as opposed to a firm set of directions - even more so than usual I mean - so basically just go and grab some tomatillos and proceed - I used a small brown bag that was about halfway full)
Cilantro, a big handful, roughly chopped
Juice of 2 or 3 limes
1 small onion, halved or quartered
2 jalapenos, split in half        (if you like things spicy, keep the seeds and ribs in the jalapenos - if you're a wimp, scrape out everything that's inside the jalapeno - that's where all the heat is)
Garlic, 2 cloves, peeled and smashed
1 cup of water, approximately       (start with 1 cup, then add more if you find it's not liquidy enough for you)
1-2 tsp of salt      (don't be afraid to put a lot of salt in, but taste as you go so you don't wreck everything)


My particular desired consistency.
Okay, so get ready for these very complicated instructions. Put everything in a pot, and bring it to a boil. Your water should pretty much cover the ingredients in the pot, so everything is almost entirely submerged. Leave it boiling, squishing everything down into the pot, until everything is soft, about 10 to 12 minutes. Get your hand blender (I think these are an amazing kitchen tool - super low maintenance and small and easy to store), and blend everything up, to your desired consistency. You could of course use a regular blender, if you like to make things difficult for yourself.

Once it cooled, I served it with nacho chips. But not before I put it into an empty salsa jar that I had hanging around in the cupboard. Made my salsa seem totally legit.

Too legit, too legit to...you know the rest.
Wait, should that be 'Two legit'?  I just remembered the hand motions.